This article explains how to use the FIELD EDITOR function to create and edit fields in Clarity Human Services.
Fields are created, edited, and deleted in FIELD EDITOR. As noted in Introduction to Fields, configurations made to a field in FIELD EDITOR impact its appearance and functionality in any screens that include the field. For more information about configuring fields at the screen level, see Creating and Editing Screens and Screen Field Editor Overview.
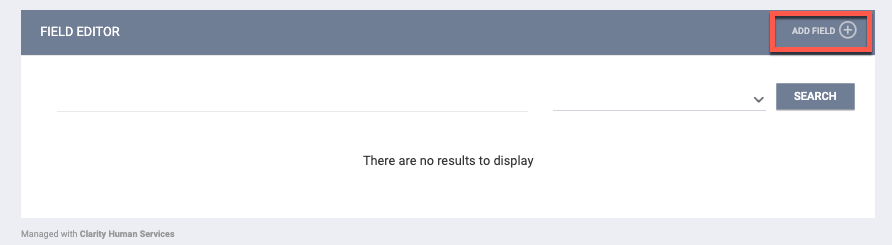
To create a new field, navigate to SETUP > FIELD EDITOR. Click ADD FIELD.
Define the field's Table Type, Display Name, Data Name, and Type. Add any Comments or Tooltip Text.

Table Type: the category of the field. Refer to Introduction to Fields for descriptions of the field categories.
Field Display Name: what the user will see on the screen. The name cannot be more than 255 characters in length (the system will not display any text beyond that limit).
Field Data Name: a unique identifier for the field. You cannot change the Field Data Name after you save the field. No two data fields can have the same Field Data Name. If you attempt to save a field with a Field Data Name already in use, you'll receive an error message. The name cannot be more than 98 characters in length.
Field Type: the type of data the field will collect. Refer to Introduction to Fields for descriptions of the nine different field types. You cannot change the Field Type after you save the field.
- If you select "Picklist," an additional Picklist Type drop-down menu will appear with the choices "Number" or "String." When you create picklist items, a code is assigned to each item that can consist either of numbers ("number") or of letters ("string"). These codes don't display in the user interface, but they can be used for reporting.
Comments: additional information about the field. For example, Core Fields associated with the HMIS Data Standards include the Data Element number and name in the Comments.
Tooltip Text: text entered here will appear when a user hovers over the field on a screen. Up to 65,535 characters can be entered for the Tooltip, but the system will only display the first 1,024 characters.
After completing the initial field configuration, click SAVE CHANGES. Additional field(s) appear:
Publish to Data Analysis: includes the field in a Data Analysis model. Refer to our Custom Fields in Data Analysis article for additional information.

Note: Once a field is published to Data Analysis, it cannot be removed.
Field Marker: If you select "Housing Inventory Custom" for the Table Type, a Field Marker toggle will be displayed after you click SAVE CHANGES.
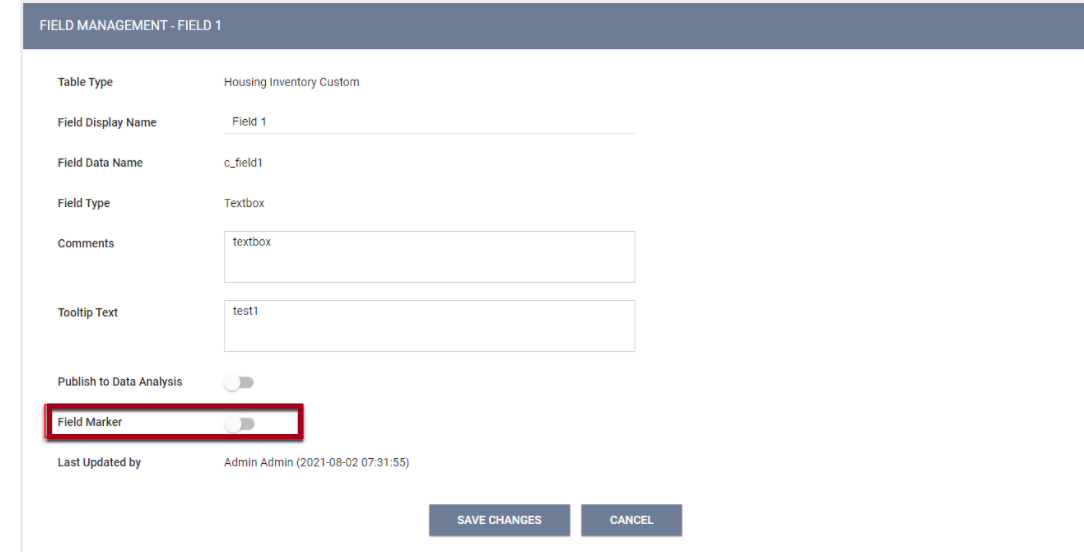
- Designating a field as Field Marker enables the system to cascade data to a Housing Inventory setup screen from the screen above it.
- If the Field Marker toggle is turned off, you can still use this field as a regular field, just not as a Field Marker.
- After turning on the Field Marker here, the next step is to navigate to SETUP > SCREENS, select a Housing Inventory screen to edit, and either add that field to the screen or select that field to edit. You will see a Field Marker toggle in the SCREEN FIELD EDITOR. Refer to the Screen Field Editor Overview article for additional details.
- Field Markers may be added to screens at any level. Keep in mind, though, that because Inventory data cascades from the level above it, a Field Marker at the Site level cannot have any data cascaded into it because it is at the top of the Housing Inventory hierarchy.
- In order for data in Field Markers to cascade, the Field Marker must be included at the level you want it to cascade from and the level you want it to cascade to, but also at all levels in between. You may hide the Field Marker at the “in between” levels if desired. For example, if you want data to cascade from a Field Marker at the Building level to that Field Marker at the Unit level, you must also include that Field Marker at the UCT level.
Creating Picklist Selection Options
After you save a field with a "Picklist" or "Multi-select" Field Type, a SELECTION OPTIONS section will appear to allow you to create the drop-down menu options that will be available for the field.
The maximum number of selection options for a Picklist field is 1000. There is no limit to the number of options for a Multi-select field.

The system automatically includes four options: "Select," "Client doesn't know," "Client prefers not to answer," and "Data not collected."
- For a Picklist field, you can edit or remove these options by hovering over the selection and clicking the Edit or Delete icon. You can also make them inactive if desired.
- For a Multi-select field, you cannot edit or delete the "Client doesn't know," "Client prefers not to answer," and "Data not collected" options, but you can make them inactive if desired.
To add new selection options, click ADD SELECTION.

In the EDIT PICKLIST ITEM pop-up, enter a Value and Description, then click ADD.
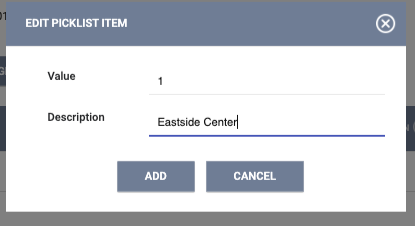
The Description is limited to 255 characters.
After you have finished adding selections to the field, click SAVE CHANGES.
To change the order of the selection options in the list, click an option and drag and drop it to the desired location.
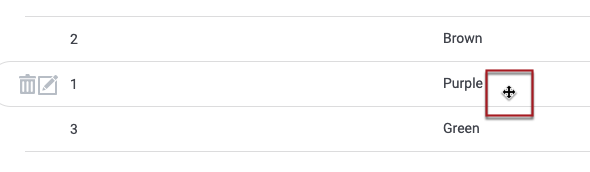 Click the Edit icon next to a selection option to edit it. Click the trash can icon to delete it.
Note: Custom picklist options created by System Administrators can be deleted as long as there is no data associated with them (i.e. if no users have selected that option as a response to a field). If there is data associated with a selection option, the system will implement logic that prevents it from being deleted. If you click the trash can icon for one of these options, the system displays a pop-up saying, "This picklist value cannot be deleted as there is data associated." To allow for immediate deletion of accidentally created selection options, the system will implement this check 5 minutes after the selection option is created.
Inactive Selection Options
You can make a Picklist/Multi-select option inactive by clicking the Set Inactive icon that appears when you hover over that option. This feature is available for all selection options created by a System Administrator, even if they have data associated with them.

Clicking the Inactive icon displays the following message: "This action will make the picklist value inactive and no longer available for use within the system. Please confirm."
- Inactive options will be greyed out in FIELD EDITOR and will be labeled "INACTIVE."
- Inactive options will not appear within screens.
- A Field Information column within the relevant database table will identify inactive fields.
- Hovering over an inactive option displays a Set Active icon. Click the icon to make the option active again.

Notes:
- Historical picklist options that are currently inactive will be labeled" "Inactive" in the client record.
- Picklist options made inactive after being selected will remain the assigned selection until a different option is selected.
The "Inactive" option applies to both custom fields and custom options in the System/Core fields.
Viewing/Editing Existing Fields
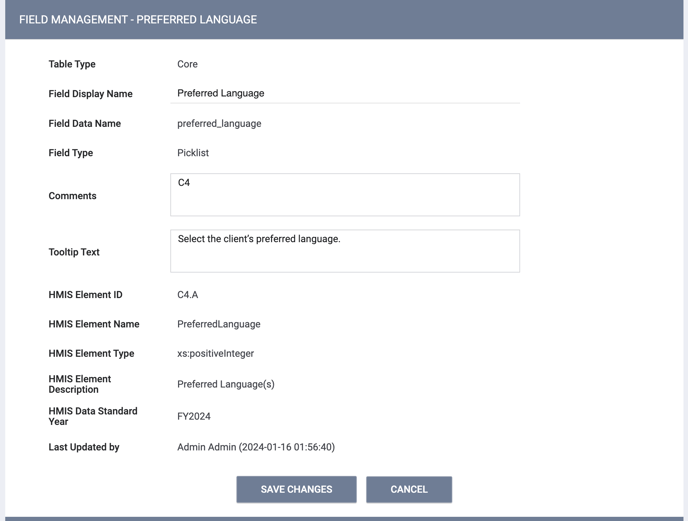
To view or edit an existing field, first search for the field as described in our Introduction to Fields article. A list of fields that meet your search criteria will be displayed. Hover over the field you want to view/edit and click its Edit icon to display the FIELD MANAGEMENT page. Edit as desired, then click SAVE CHANGES.
Notice that, for System/Core fields associated with HMIS Data Elements, the system displays the following read-only fields in addition to the fields described above:
- HMIS Element ID (Hmis_element_id): the official data element number from the HMIS Data Dictionary.
- HMIS Element Name (hmis_element_name): the name of the element used in the HMIS CSV and XSD files.
- HMIS Element Type (hmis_element_type): the XML Schema type of the HMIS element.
- HMIS Element Description (hmis_element_description): the description of the data element from the HUD Data Dictionary.
- HMIS Data Standard Year (hmis_data_standard_year): the version of the HMIS Data Standard, such as FY2024.
Note: If you click SAVE CHANGES on the FIELD MANAGEMENT page without making any changes, the system will not display the green "Changes successfully saved" banner, track the action in the Audit Log, or update last_updated and ref_user_updated.
Deleting Existing Custom Fields
To delete a field, hover over the field in the FIELD EDITOR search results and click the trash can icon. A field that is currently included in a screen cannot be deleted until it is removed from that screen.

Audit Log
Users with the appropriate access can click the Audit Log button at the bottom of the FIELD MANAGEMENT page to track the following:
- Adding fields
- Changing field values
- Adding/modifying/deleting/inactivating/activating picklist selection options
Updated:02/05/2024