The Release of Information system settings allows administrators to establish the conditions for sharing a client’s information in Clarity Human Services.
Overview
The Release of Information settings, which can be configured distinctly at the system, CoC, or agency level, include options such as whether an ROI is required to create a new client record, the types of documentation allowed, the terms of expiration, and the ability to create forms that can be electronically signed.
Note: Release of Information settings and Sharing settings operate distinctly. Whether or not an active ROI is present in a client record will not impact how client data is shared.
Refer to Release of Information (ROI) Overview for information on the end-user workflow for recording an ROI in the client record.
Configuring Release of Information Settings at the System and CoC-Level
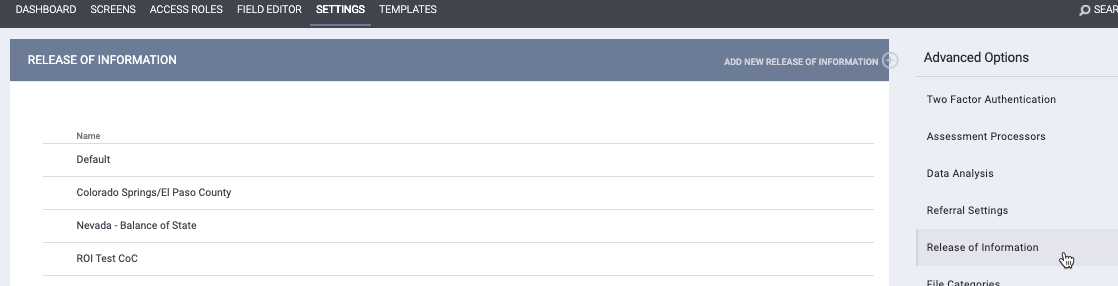
To access system and CoC Release of Information settings, click the launchpad and navigate to SETUP > SETTINGS > Release of Information.
In the absence of any CoC-specific ROI settings, the system will apply Default settings to all agencies.
To establish distinct settings for each CoC, click ADD NEW RELEASE OF INFORMATION.

The system will apply Default ROI settings to any remaining CoCs that do not have their own distinct ROI settings.
Settings
The RELEASE OF INFORMATION screen provides the following configuration options:
CoC: defines the CoC for which the ROI settings apply. This option is only displayed when new ROI settings are first created and cannot be edited later. The CoC selection defines the ROI settings the user will see based on their primary agency or the agency they are switched into.
Require on Creation: enable this setting to require that an ROI must be recorded before a new client record can be saved. In the Client Profile, the ADD RECORD button will not even appear until the ROI is recorded. Instead, the user is prompted to "Please fill in the Release of Information form."

After the ROI is recorded, the ADD RECORD button appears.

If Require on Creation is toggled off, users can create client records without an ROI. An ROI can be added later by clicking the shield icon.
Default Model: if Compliance Warning is enabled, the selected Default Model will determine when the compliance warning displays in the client record. There are four default models:
- System: If there is at least one active ROI in the client record, the compliance warning will not appear. (This option is only available in Default ROI settings.)
- CoC: The compliance warning will appear unless the client record contains at least one active ROI recorded by a user at an agency within the CoC.
- Agency: The compliance warning will appear unless an active ROI is recorded at the agency in which the user is viewing the client record.
- None: no ROI is required. The compliance warning will not appear, even if Compliance Warning is enabled and there is no ROI in the client record.
Default Term: sets the expiration date for the ROI. Default Term options are available from 1-10 Years. The Default Term will automatically calculate from the Start Date value the user enters when recording the ROI.
Compliance Warning: when this setting is enabled, a warning ribbon appears across the screen of any client record with a missing, expired, or soon-to-expire ROI form (subject to the Default Model selection).

Compliance Expiration: This setting defines how soon the Compliance Warning appears before an ROI is due to expire. Options range from 5 days to 3 months.
Allowed Documentation Types: options include Electronic Signature, Attached PDF, Signed Paper Document, Verbal Consent, Outside Agency Verified, Household, Group Member, and None. Depending on the selection, additional steps may be required (i.e., attaching a file, electronically signing). Please see the Release of Information Overview for more information.
Note: Any of the options that are set as a community's Allowed Documentation Types -- even "None" -- can be selected by the end user to clear the Compliance Warning.
Enable Consent Refused: enables the Consent Refused functionality. This functionality can be enabled independent of the ROI by toggling off Require on Creation but enabling Consent Refused. When Enable Consent Refused is toggled on, users will see the Consent Refused option at record creation but not the ROI option.
Auto-expire ROI: This option allows system administrators to automatically add an expiration date to all unexpired ROIs for the Continuum (or Continuums, if enabled in Default settings). To avoid accidental mass expirations, this is a two-step process:
- Enable Auto-expire ROI
- Click Mark all ROIs as expired

ROIs that are auto-expired will be tracked in the client's ROI Audit Log.
Note: If a Release of Information (ROI) is dated today, and Mark all ROI as expired is selected today, the ROI is expired today.
ROI Status on Client Search Page: when this setting is enabled, an ROI column displays one of the following next to the name of each client in the search results on the client search page:
- "Yes" indicates that the record contains an active ROI with permission set to "Yes."
- "No" indicates that the record contains an active ROI with permission set to "No."
- "Missing" indicates that the record does not contain an active ROI.

The ROI Status is subject to the ROI settings (default or CoC-specific) and the Default Model setting.
Form Editor: Use the Form Editor to configure the form the client will sign if the staff member selects "Electronic Signature" as the Documentation type.
Note: If an ROI contains more than one signature box, each one must be a unique element ({$SIGNATURES.0}, {$SIGNATURES.1}, {$SIGNATURES.2}, etc.) for the ROI to function properly. To achieve this, the system automatically assigns a unique number to the element each time a user clicks the Signature button to add a signature box.
If duplicate signature fields (such as {$SIGNATURES.0} and {$SIGNATURES.0}) are created by copying and pasting, or by manually editing the number to create a duplicate, the ROI will not function properly in the client record.
The system will not allow an ROI to be saved if it contains any duplicate signature boxes.
Audit Log
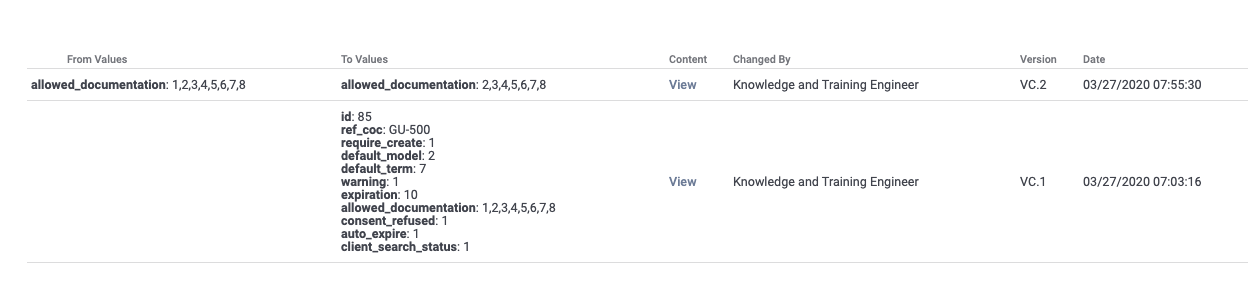
Click the Audit Log icon to view changes made in the Release of Information settings.

The Audit Log displays information such as who made the changes and when.
Configuring Release of Information Settings at the Agency Level
The Release of Information settings can also be configured individually for each agency. An agency's ROI settings will override the ROI settings established in System Setup.
To configure ROI settings for an agency, navigate to MANAGE > SHARING > Advanced Options > Release of Information (ensure you are switched into the correct agency first).
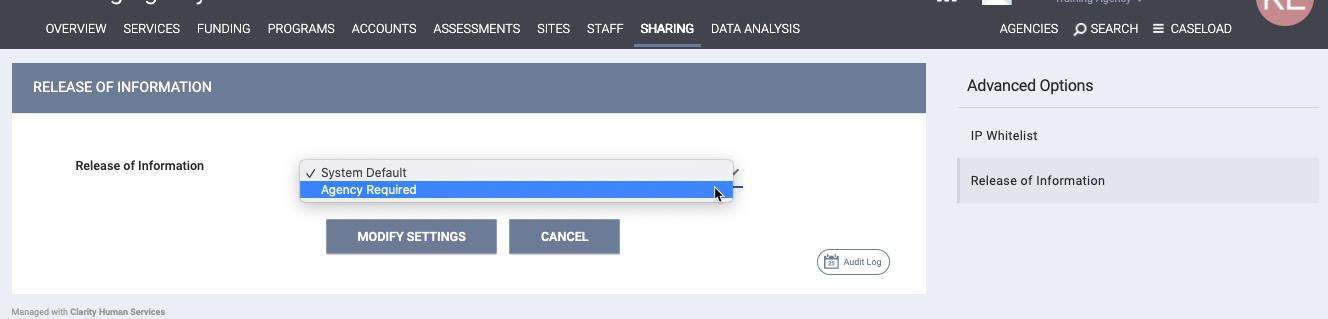
If "System Default" is selected, the agency's ROI settings will be subject to either the Default ROI settings or the ROI settings for the CoC (if applicable).
If "Agency Required" is selected, the same configuration options available in the system ROI settings will be available for the agency.
Users with the appropriate access can click the Audit Log button to track changes made to the Release of Information setting.
Note: If you click MODIFY SETTINGS on the agency-level RELEASE OF INFORMATION page without making any changes, the system will not track the action in the Audit Log, will not display the green "Changes successfully saved" banner, and will not update last_updated and ref_user_updated.
Updated: 04/09/2024