This article explains how to assign scores to field responses in assessment screens.
Overview
Assessment Processors allow system administrators to assign scores to field responses in assessment screens like the VI-SPDAT assessments. Assessment Processor scoring can be used to set up eligibility criteria for use in direct referrals and can also be used for prioritization in the community queue.
Assessment Processors are assigned to specific assessment screens. When a user completes data entry for that assessment screen in a client record, the assessment screen's fields will be scored and used to determine eligibility.
Notes:
- Only system administrators can create and edit assessment processors.
- Before creating the assessment processor, create any necessary custom fields.
- We strongly recommend creating the associated assessment screen before creating the assessment processor.
System Assessment Processors
Assessment Processors created by Bitfocus are marked with a SYSTEM label. Because System entities are not editable, the System Assessment Processors will not be adjustable but can be copied as a custom Assessment Processor so that any necessary adjustments can be made.
A "-C" at the end of an Assessment Processor's Code and a "(Custom)" at the end of the Name indicate that the processor was provided by Bitfocus and adjusted by the community before the "System" label was introduced.

Creating an Assessment Processor
Click on the Launchpad and navigate to SETUP > SETTINGS > Advanced Options >Assessment Processors.
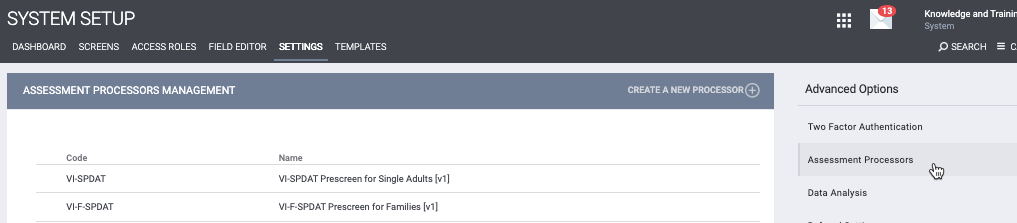
On the ASSESSMENT PROCESSORS MANAGEMENT page, you'll see the system processors and any previously created custom processors.
To create a new assessment processor, click CREATE A NEW PROCESSOR.
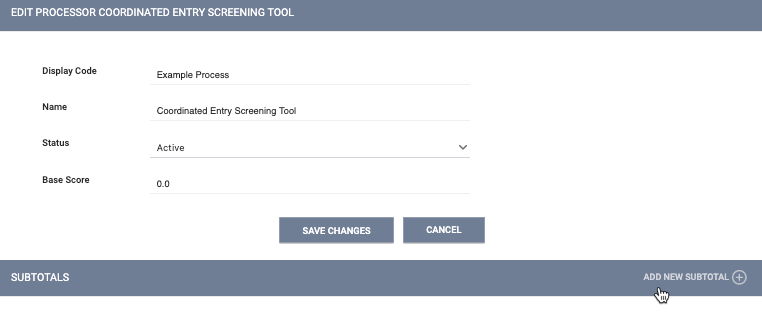
Complete the following fields on the ADD NEW PROCESSOR page:
- Display Code: This is the name that appears for the processor in the client record history and in the Code column on the ASSESSMENT PROCESSORS MANAGEMENT page.
- Name: This is the name that will appear in the Name column on the ASSESSMENT PROCESSORS MANAGEMENT page. Including the name of the associated assessment here can be helpful for reference.
- Status: When "Inactive" is selected, the processor cannot be assigned to an assessment.
- If the processor is already assigned to an assessment when "Inactive" is selected, it will no longer be assigned to that assessment.
- If "Active" is selected later, the processor will be re-assigned to the assessment.
- Base Score: a fixed score to be added to the assessment regardless of the specific points defined.
Click SAVE CHANGES. The SUBTOTALS section will display.
Subtotals
The first layer of an Assessment Processor is an individually scored section called a "Subtotal." You can create a single Subtotal in which all points will be calculated, or multiple Subtotals that can be added, subtracted, multiplied, or divided to produce the overall assessment score. The "Order of Operations" section below explains how the system calculates multiple subtotals.
To add a new subtotal, click ADD NEW SUBTOTAL.
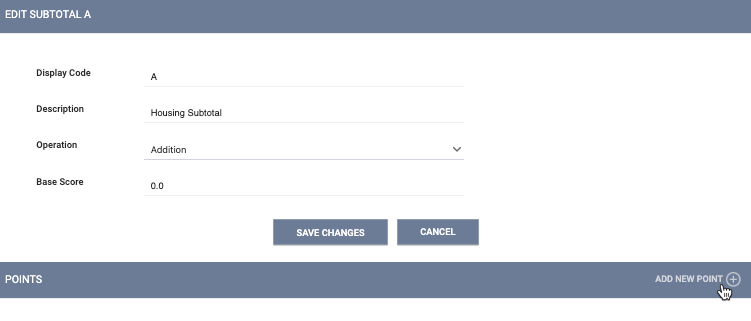
Complete the following fields on the ADD NEW SUBTOTAL page:
- Display Code: used for organizing subtotals (i.e., A, B, C). The system will display a period after the Display Code.
- Description: This is a descriptive name for the section (i.e., "Housing History," "Living Situation") that appears after the Display Code.
For example, if you enter "A" for Display Code and "History of Housing & Homelessness" for Description, the Subtotal will appear in the SUBTOTALS section, as shown below.
- Base Score: adds a fixed point value to the Subtotal, regardless of the points and conditions configured in the next step.
Click SAVE CHANGES.
- The Operations field appears in the EDIT SUBTOTAL section.
- Select "Addition," "Subtraction," "Division," or "Multiplication" as applicable to designate how this Subtotal will be applied to produce the overall score.
- The POINTS section appears below the EDIT SUBTOTAL section.
Points
The next layer of organization in an assessment processor is a "Point," which is used for assigning a score to one or more fields. You can store as many Points as applicable under each Subtotal.
To add a new Point, click ADD NEW POINT.
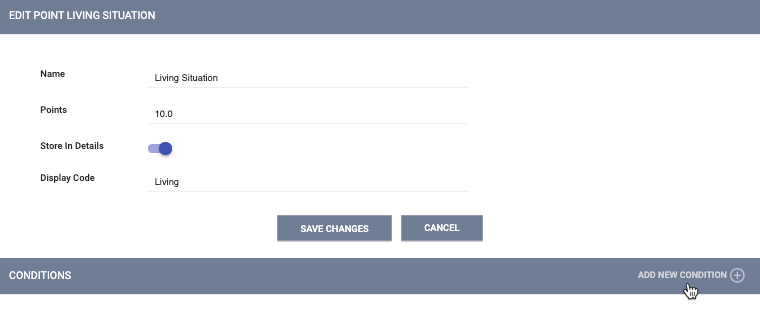
Complete the following fields:
- Name: should be either the name of a specific field or a description of a few fields.
- Points: the score that will be assigned if the Condition(s) (to be established in the next step) are met.
- Store in Details: enabling this feature allows the Point (and its associated conditions) to be stored and used as a condition elsewhere in the processor.
- Display Code: If you turn on Store in Details, you will use this field to enter a name for the stored Point. The name you enter here will appear in the Field drop-down menu described in the "Assessment point" section below. The Display Code must have four or more characters, begin with a letter, and only include letters, numbers, and underscores.
Click SAVE CHANGES.
Note: Prior to March 2017, Display Codes for Points could be duplicated within Assessment Processors. For example, within the "VISPDAT Prescreen for Single Adults v1" Assessment Processor, the "Wellness" condition had 4 Points with the same code of "MedicalCondition."
When copying Assessment Processors, the system ensures there are no duplicate Display Codes. Therefore to ensure that all Points can be copied appropriately, any existing duplicate Display Codes will be updated to concatenate the code and point ID (the number at the end of the URL on the EDIT POINT page) to be unique; i.e., a duplicate Medical Condition with id=53 will be updated to MedicalCondition_53.
Conditions
The last layer of assessment processor organization is a "Condition," which defines how Points are assigned.
A Point can have just one Condition or a combination of Conditions. Each field that should result in a score needs at least one Condition.
To add a new condition, click ADD NEW CONDITION.
Select a condition Type. There are two types: "Demographics" and "Assessment point."
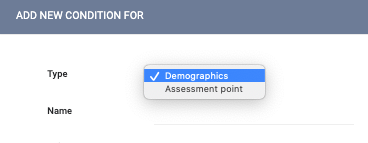
- Demographics Conditions
"Demographics" conditions allow you to select a field from FIELD EDITOR.
-
- Name: Begin typing the field name; the system will auto-suggest fields from Field Editor. Tip: open the associated assessment in another window so that you can reference the exact field display name.
- Value: choose or type the answer that will result in a point.
Note: Be sure to select the correct field; only fields in the assessment to which the Assessment Processor is assigned will generate points.
Click SAVE CHANGES. Select the relationship between the selected field and the value.

Click SAVE CHANGES.
- Assessment Point Conditions
"Assessment point" conditions use data from a Point in the processor that has Store in Details toggled on. This feature simplifies the creation of Conditions that rely on fields already in the processor.
-
- Field: Select the name of the stored Point from the drop-down menu. If you have not yet turned on Store in Details for any Points, this menu will be empty.
- Value: the score upon which the Condition will be built.
Click SAVE CHANGES. Select the relationship between the stored Point and the value.

Click SAVE CHANGES.
Multiple Conditions
To add additional conditions to a Point, click ADD NEW CONDITION and follow the same steps as above. An "And/Or" drop-down menu appears for each added Condition. Select the appropriate option:
- "And" means all conditions must be met to result in a Point.
- "Or" means at least one of the conditions must be met to result in a Point.

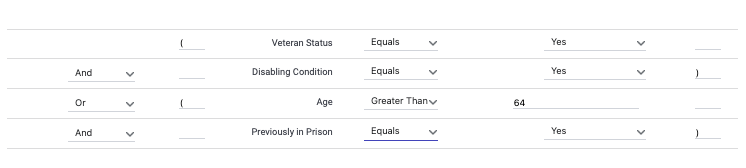
For more complex sets of conditions, you can use parentheses (also known as brackets) to designate the relationships between the conditions. For example, in the image below:
- There is one set of parentheses around "Veteran Status equals 'Yes' And Disabling Condition equals 'Yes'"
- There is another set of parentheses around "Age is greater than 64 And Previously in Prison equals 'Yes'"
- There is an Or between the two sets of parentheses.
- Veteran Status equals "Yes," AND Disabling Condition equals "Yes"
- Age is greater than 64 AND Previously in Prison equals "Yes."
Note: If you click SAVE CHANGES on the EDIT PROCESSOR/ SUBTITLE/ POINT/ CONDITION pages without making any changes, the system will not display the green "Changes successfully saved" banner, will not record the action in the Audit Log, and will not update the last_updated and ref_user_updated fields.
Order of Operations
When multiple subtotals and/or points are included in an Assessment Processor, each score's operation is applied to the score before it, including the base score. These operations are performed one at a time. Points are scored first, followed by subtotals.
In the image below, the base score for the processor is 0 points. Subtotal A is worth 2 points, subtotal B is worth 4 points, subtotal C is worth 10 points, and subtotal D is worth 5 points.
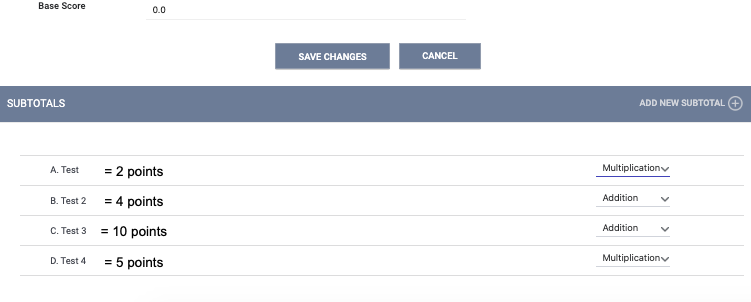
The steps in calculating the total score are as follows:
- The first Subtotal ("A. Test") has "Multiplication" as its operator, so we will multiply this Subtotal (2 points) by the Base Score (0.0).
0.0 X 2 = 0 - The second Subtotal ("B. Test 2") has "Addition" as its operator, so we will add this Subtotal (4 points) to our result from Step 1.
0 + 4 = 4 - The third Subtotal ("C. Test 3") has "Addition" as its operator, so we will add this Subtotal (10 points) to our result from Step 2.
4 + 10 = 14 - The fourth Subtotal ("D. Test") has "Multiplication" as its operator, so we will multiply this Subtotal (5 points) by our result from Step 3.
14 X 5 = 70 = Total Score
Viewing Scores in Assessments
When a user completes an assessment with an Assessment Processor in a client record, a score summary will display the points for each subtotal and the total points (unless the screen's Display Score toggle is turned off).

Copying Assessment Processors
To copy an Assessment Processor, click its Copy icon. The copied Assessment Processor will appear in the list, with the words "Copy of" in front of its name. The copied Assessment Processor is editable.

Editing Assessment Processors
Assessment Processors are editable. To edit an existing processor, click the edit icon beside it.

If you delete a component that contains a bracket, you will see a pop-up warning asking you to review the bracket configuration to ensure that the logic is still configured correctly.
Note:
- The VI-SPDAT assessments are based on a standard design created by OrgCode. System VI-SPDAT assessments that have been edited cannot be considered official VI-SPDAT assessments.
- An edit to an Assessment Processor will only affect assessment scores recorded after you save the change; scores of historical assessments will not be affected. Before editing an Assessment Processor, have a clear direction for the assessment with mapped-out details of where points will be assigned.
The next step after creating an Assessment Processor is to assign it to the assessment.
Audit Log
Users with the appropriate access can click the Audit Log button at each level involved in configuring Assessment Processors: the Processor, the Subtotals, the Points, and the Conditions.

The Audit Log tracks change to the fields listed in the table below.
|
The Audit Log on this page: |
Tracks changes to these fields: |
|
EDIT PROCESSOR |
Display Code, Name, Status, Base Score |
|
EDIT SUBTOTAL |
Display Code, Description, Operation, Base Score |
|
EDIT POINT |
Name, Points, Store In Details, Display Code |
|
EDIT CONDITION |
Type, Name (for Demographics Conditions), Field (for Assessment Point Conditions), Value |

Updated: 10/1/2023